🌼 Grow Your Green Thumb with Greengro!
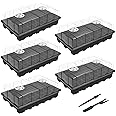
The Greengro Greenhouse is a robust and spacious gardening solution measuring 57 x 57 x 76 inches, designed to protect your plants from the elements. With a durable PE cover, sturdy alloy steel frame, and easy assembly, this greenhouse is perfect for both indoor and outdoor use, accommodating a variety of plants while ensuring optimal growth conditions.


| Frame Material | Alloy Steel |
| Cover Material | Polyethylene (PE) |
| Nominal Wall Thickness | 16 mm |
| Item Dimensions L x W x H | 56"L x 56"W x 75"H |
| Door Style | Zippered Roll-up Door |
| Color | Green |
| Number of Doors | 1 |
| Closure Type | Zipper |
A**L
Perfect for starting a garden
Very easy to put together, we put extra weights on it just for security purposes. Living in northern NY, our growing season isn’t long so I enjoy my green house
A**R
Pretty big and holds quite a bit of plants.
Relatively easy to put together. I've put one of these little greenhouses together before, so this one is pretty easy to set up. I like that the little crate shelves come with snap holders to keep the shelves in place. I really like the amount of space and height.
B**S
Seems great for small-scale gardening needs & okay for the price.
This is a review for the 56”x56”x75” “Durable Green House Kit with Windows, Thicken PE Cover, Three Tiers, 8 Shelves, Heavy Duty Walk-in Green House.“Style-2” $69.99 after applying $20 “coupon”August 2024I bought this greenhouse with the intention of using it early next year when I begin sowing seeds for the gardening season. But I went ahead and assembled it to make sure everything was there, and in proper order, within the 30-day return window… and am currently using it to cover a new pool pump/sand filter with salt chlorinator (review coming soon 🙂), for the last month of the swimming season… and then will pack it up until I need it for my gardening adventures. I will update this review… if I run across anything noteworthy as I get more use out of it.Pros:• Packaged & organized well. Pole packages have the part ID (numerical) labeled on the outside of each individual package. The fittings are mixed together in one large bag, but nearly all of them are marked with the part ID (alphabetical)… the only fittings not marked are those for the roof pitch… which are obvious and installed last.• Instructions were clear and easy to follow… as the design is fairly repetitive.• After laying out the parts & skimming over the instructions… it took me about 45 minutes to assemble the greenhouse by myself.Cons:• The ground stakes are tiny (~5.5” long & ~1/8” diameter) and likely insufficient for mild wind gusts. Of course the additional weight of laying bricks or heavy stones along the bottom edge of the cover… and/or having items on the shelves… should help secure it some. However, I feel using larger ground stakes is the best option… and as inexpensive as they are… they should be included with the $70 price point.• The inside ties, to secure the cover to the frame, are long enough to easily tie a standard tight knot… but not long enough to tie in a way that’s easier to untie.• The inside cover ties, at the bottom of the cover… should all be long enough to tie onto the bottom of the frame (versus only the vertical corner rod)… to help keep the cover pulled as close to the ground as possible. However, only two of the bottom ties were long enough to do so. The other two had to be tied to the vertical corner rod… which, even with some paver stones laid along the outer flap… the cover “rides up” the corner pole when the greenhouse moves while opening/closing etc. Tho I suppose that may be more of a personal preference thing… since, either way, the inside of the greenhouse is not sealed off from the earth.{In the spring, I am going to use something like small zip-ties, carabiner clips, or binder rings to better connect the cover ties to the frame.}• The shelves are composed of thin wire and are not suitable for very much weight. I would advise using lightweight, plastic containers… particularly if the size is smaller than the width of the framing bars the shelves sit on. (If the container will cover over the framing bars… the bars will add a bit of additional support.) Overall, just be mindful of the shelves, watch for any “sagging”, and consider adding extra bracing if needed.• The, two per shelf, “plastic hooks”, intended to secure the wire shelves to the framing bars, are totally worthless. I recommend using small zip-ties instead… as they’ll keep the shelves from sliding and add additional support against sagging and collapsing from the weight of plant containers.• The small side windows do not zip or seal shut. They are supposed to be held closed by Velcro in the lower corners. However, the Velcro on mine do not line up… so the window cover does not lay flat over the window opening. This doesn’t matter for my needs, but could be remedied with the addition and proper placement of additional Velcro… either stick-on or use glue to apply.Tips/Additional Info:• It really helped me to have all of the parts laid out and organized before beginning.• Consider using zip-ties, etc as mentioned under “cons.”• Def follow the recommendations for installing the cover… recheck all fittings, to make sure they’re pushed together tightly… unzip the cover door… and start from the rear roof pitch and work forward. If there’s a spot where the cover doesn’t seem to fit… check the fittings again… as some do sort of slip a bit when the frame is being moved around.• Use better quality ground stakes… unless the greenhouse will be protected from wind gusts and kids/animals running wild.• “Three tiers” includes the ground. There are only wire shelving for the upper two tiers.• While nearly all plastic covers have some sort of odor to them when first opened… this one wasn’t overwhelming or anything that required “airing out” before putting together.Overall, I think this will work well for my early, small gardening needs… but I’ll have to wait and see as far as how well it holds up and all. I’m hoping it will do until I’m able to finish gathering everything needed to put together a much sturdier DIY greenhouse-Price-wise… between the sub-par ground stakes and shelving stability… along quality control issues, like the cover ties and window Velcro… I feel like this should be more around a $50 price point instead of $70 (after coupon discount)… but also understand that everything is higher than what it should be these days. (Either way, I definitely would not pay any more than $70.)Again… I will update this review if anything noteworthy comes up along the way. Until then… if you find any of my reviews to be helpful… please consider hitting that thumbs up button. 😊
D**E
Perfect for whats needed.
Good size greenhouse for what its needed for. The directions weren't that helpful and because of that i had to take it apart 3 times and took 3 hours to put together cause the pieces and where they go can be tricky. Just pay attention to the images cause it helps with putting it together.
A**R
Does not play well with wind
I loved this greenhouse, it was perfect for my needs, just the right size, looks nice, the shelves worked well however the clips for the shelves kept popping off, so I used zip ties, no big deal. I did use much longer, sturdier stakes than the ones that came with it. I was able to assemble myself in a few hours time. The problem came when we had a couple of windy days, not crazy wind, didn't blow branches out of the trees or cover the yard in palm fronds; just a little gusty. The greenhouse went flying. It did survive for the most part, I can still use it but a couple of the pvc connectors are broken and the frame is a little bent. The stakes held but but the cord attaching the cover to the stakes stretched out so it was able to topple. Put it back up and tried opening the windows so the air could flow through instead of lifting up the entire thing. Didn't work, same thing happened so now on windy days I will have to take the cover off which will expose my young seelings to the elements. I had everything ready to start my seeds. Lost all the organic soil but thankfully I had not planted the the seeds yet. That would have been costly. Hoping to find a better way because in SW Fla, we do get breezy. I gave 3 stars because other than the issue with the wind it seems to be well made and sturdy. One of the corner ties ripped out because the stakes held, a couple connectors broke, but other than that it's pretty sturdy.
M**E
Nice little green house
Nice little green house. Set up took a bit, but my husband didn't read the directions. Lol.
S**W
Great little greenhouse
Great little greenhouse. Holds everything I need to do my flower potting, even fit an old table I had. I used a brown tarp on the ground for a floor. I cannot get the cover tight enough to zip the second zipper.** Excellent customer service! I was short one specific joint, I emailed them, and they sent me a box of different joints, and I was able to complete the build **
J**X
An affordable solution for a green house before you go to a permanent solution.
The cover seems well-made made but the hold-down stakes are a joke. They are bent wires that will pull out of the ground at the slightest gust of wind. Purchase some real camping stake or better yet use the dog tie out ground screw as anchors. It should take about a 1/2 hr. to assemble, and if you have LE-GO kids, they'll love assembling it. With the double shelves on each side, you have 3 tiers for plants. That's a lot of seedlings. We expect this fall to move this into our great room, sit it on a tarp floor, and use it as an indoor greenhouse with grow lights to see if we can continue with a winter harvest. We know that when the sun comes out, the space jumps 15 degrees.
Trustpilot
1 day ago
1 month ago